Tuesday, March 19, 2019

Final Reflections, Session 2

For my final reflections this time, I decided to use what I think is the Coolest new Tool in my Toolbox, a green screen video:


Okay, it's not perfect.  But definitely buying the green St. Patrick's Day tablecloth from Party City made my background/foreground issues easier to deal with.  I think I did okay with the Chroma and transparency adjustments, and my eyes are no longer portals into hell.  I like the look.

I realize I SHOULD use a script when doing this, because I am a little nervous when recording myself.  The "take" I used was the best of about six.  And for some reason the animated GIF that I created with one of the lessons is presented in the background as a static image.

The last video -- the screencast -- that I included as a background --  hmmmm. I wish I could have muted the volume a little, but perhaps because it was such a huge file, the doInk green screen program would not allow me to turn down the sound. I hate that, as foreground David Ames is speaking to the camera, background David Ames is trying to present a lesson to his absent students.  Too many voices.

I did have some difficulty in manipulating the files as I was putting this together, but some of that I attribute to spotty internet service.  I think that in the future if I create the materials at work, instead of at home, I will be able to deal with some of these glitches more easily.

I have really enjoyed the work I have done in this workshop, and I intend to continue to sharpen my tools, and to implement these lessons in my class with my students.

Thank you for the opportunity for an old dog to learn a few new tricks.

                                                                         -- David


Sunday, March 10, 2019

Thing 19: Screencasting and Screen Sharing

One of the biggest problems I face in the classroom is absences.  Students are absent because they are not at school, or they are in school, but are not in the classroom for one or more reasons.

And then they want to get the work that they have missed. 

(Well, in a perfect world, they want to get the work that they have missed.)

But even if you give them the work, how much of the lesson are they going to be able to master if they have missed all the give and take of class discussion, and all the explanation and demonstration of models that teachers just naturally provide on an everyday basis? 

So you give the student a stack of papers, and they are returned to you half blank, with the explanation: "I didn't know what to do," or "I don't know what you want."

By using screencasting tools, I can use the PowerPoint lesson I work with in the classroom, and provide an accompanying narration, that will (I hope) guide students through the basics of the lesson.

And because they will be viewing this on their own, they will be able to pause and replay as much as they want.  (This can also be advantageous for students who simply do not "get it" the first go round.) 

I read the article "How to Screencast in 3 Simple Steps," by Vicki Davis.  I have to be careful about a lot of the recommendations, because when I am using my school-issued laptop (on which I try to keep everything I need for school), I am not given the authority to download programs.  Some of the other articles here guided me to programs I was blocked from downloading.  (For instance, I really liked Kasey Bell's article "How to Create Screencast GIFs," but when I tried to download Gyazo, my laptop blocked me because I lack administrative privilege. 

Vicki David recommended Screencast-o-matic, and remarkably, I could get it on my laptop.  It was easy.  I was also pleased to see that it will work on my students' chromebooks (according to Richard Byrne, in "Eight Options for Creating Screencasts on Chromebooks," and Jenn Sheffer, who shared some examples of student work using Screencast-o-matic in "Students Teaching Teachers with Screencast-o-matic.")

Anyhow, I decided to try a Screencast in which I guide students through the opening lesson of a unit, in which they had to respond to pictures in a Gallery Walk (which I have presented as a slide show) and read a non-fiction article and complete a graphic organizer.  I did it a few times (I hate the sound of my voice in recordings, and, yes, I stuttered a little the first two attempts), and there are still a couple of mistakes.  But I think I have managed to create something that will come in pretty handy as I have students trying to make up work.  I can just post this on my class website.

Anyhow, here is my Screencast:


Monday, March 4, 2019

Thing 24: Google Drawings

I am an English teacher, or, in other words, I am a thief.  Any good idea that I see, I want to steal. 

Just last week, I was lamenting about trying to recreate a Frayer Model worksheet in Google Docs, which I had previously created in Microsoft Word. To me, Word was much more user friendly, but we have to re-do everything in Google Docs now, so I will just stop complaining before I become too annoying.

I finally gave up and just did the best I could with a simple table.  And then I discovered Google Drawings as a Cool Tool I could play around with.  I like putting pictures in my work, and I thought that Google Drawings might give me some useful tools.  But when I opened it up and began reading the articles, what is one of the first things I discover?  Matt Miller's "25 Free Google Drawings Graphic Organizers and How To Make Your Own."   

I don't want to tell you how fast I was in downloading these to my own Google Drive, and among them, what do I find?  None other than my own beloved Frayer Model:


I like his idea, too, of making this accessible to my students on-line through our Google Classroom, and giving them the chance to make their own copies and then complete them.  It could make the illustrations a lot more interesting if students can insert images that they find on-line.  And it will mean less time at the copier for me.

Another article that I really liked was Matt Miller's  "Google Drawings Interactive Posters (no glue sticks necessary!)"  I like the idea of setting up assignments for my students, which I can post on our Google classroom, and they can simple follow the links to all the sites I want them to visit, and all the parts of the assignment that I expect them to complete.

I used Google Drawings to make an interactive poster, including links to three of the resources in this lesson (two to the magnetic poetry creators, and one to the magazine cover templates).  If you click on the image, the link will take you to the website where you can create your own magnet poem or magazine cover.  (These resources were covered in "Get Creative with Google Drawings" by Tony Vincent.)

 
Unfortunately, the problem that I am encountering as I post this here, is that I created it as a Google Drawing, and to include it here, I had to use my snipping tool and import it as a picture.  (If someone knows a way I can post it in my blog and still retain the interactive functionality of the links, I would welcome his or her advice!)

Click here to view the actual Google Drawing, and then you will be able to click on the links and have them work. 

Google Drawings is not exactly what I had expected to find, but I find it much more useful, and I can see a lot of ways I can use this myself.  I think it would be great to have the students use it to make Interactive Posters, I am just concerned about how much time it might take to teach them the program.  I could be underestimating my students, though.  They may be lightyears ahead of me.


Sunday, March 3, 2019

Thing 26: Media Skills

One of the best ideas I got from this tool was from the article 9 Ways Classroom Photos Can Create Student Connection, by Jenn Horton.  I loved the way she had students write their personal mission statement, and then print it on a picture of the child.  We have students write their own mission statements at the beginning of the school year (as we are examining the school mission), and I think that producing them the way she does will yield a more meaningful result, and more student buy-in.

The Windows Screenshot Tips wiki webpage was a very useful introduction for me to what should probably be a very basic skill.  I am embarrassed to confess that I never knew I could create a screenshot of my computer screen, and realize how much time that could have saved me when I've been trying to explain a problem that has been going on.  In this case, I have a feeling that a picture is worth A LOT more than a thousand words.

The process was very simple, and I was able to make a screen shot using the first method described, holding the windows key and pressing the PrtScr key at the same time  (Hey, when did they put that key on the keyboard?).  Here is my first screen shot from my school laptop: Ta-Da.


And that folder, in my Pictures folder, labeled Screen Shots -- was that there before, or did the computer automatically create it when I made my first screen shot.  I swear that I had never noticed it previously.

I also learned to make a screen shot from my iPhone.  I have a feeling that this will come in very handy when I am trying to explain problems that I am experiencing there as well.  Here's a picture of a screen shot from my favorite new app, Do Ink:


Malaika Nicholas's blog entry 5 Ways to Make an Animated GIF (Without Photoshop!) introduced me to something that is pretty fun.  I chose to use the second GIF maker she recommended because it is free and purportedly easy.  I did feel that it was very easy to use, but when I went to publish the GIF I had created, I was informed that I had used premium features and it would cost be $7.99 a month if I wanted to continue.

I did not.

I was a little annoyed that I had gotten no warning when I had gone into premium features, so I tried to go back and make it as simple as I could, with no bells and whistles.

So here it is, a simple message to my students that there is no substitute for reading the book, using a snippet from a Key and Peele skit with the substitute teacher Mr. Garvey.


I hope to make some more animated GIFs, and I like that I can snag a three second clip from just about any video on YouTube and use it with my own caption.  These will be fun to include on my class website.


Monday, February 25, 2019

Thing 25: Green Screen Fun

Okay, as soon as I saw that this was an option, I knew I wanted to do it.  A friend of mine had just posted a video she and her niece had made using a green screen over the February recess, and I had just assumed that it was something beyond my technical abilities. 

But when I noticed that it was an option to work with here, I knew that I would be able to master it, eventually.  All the tools are user friendly, and I haven't encountered anything beyond my reach, if I just take the time.

After reading the description and the articles that people had posted, including the examples that many had created or had their students create, I had some good ideas of ways that I can incorporate this tool into my classroom.  I can totally see students using this for presentations in our final project of the year, instead of the presentation board or PowerPoint that many chose to use last year.  Since their project works with The Omnivore's Dilemma, how cool will it be to have them standing in a corn field or a cow pasture as they talk about our food sources, or how much more powerful their points might be about a slaughterhouse, if they have some video rolling in the background.

I downloaded the app DoInk, which seems very user friendly, and the issues that I am having currently are things that I hope I can eliminate with a little fine tuning.  I used a green blanket as my backdrop, but I think that I may have better luck if I buy something that is a brighter green -- I noticed that one participant highly recommended using bright colors.  I think my green is a little too olive, and as a result some weird things are going on with my eyes and my hair.  I played around as much as I could with the chroma function, but I am still not 100% satisfied -- I am hoping that a brighter background might clear things up.

At first, the volume on my background videos drowned out what I was saying, but that was a simple adjustment, too.

I chose some images of my mother's and aunt's visit to me from last summer, and I can't wait to send her a copy and see if she's amazed.  But anyhow, here is my first green screen experiment:


Monday, January 21, 2019

Thing 31: Final Reflections


Bitmoji Image


Time to reflect.

https://commons.wikimedia.org/wiki/File:The_Thinker_(Le_Penseur)_MET_4522.jpg

As I often tell my students in class, the only people who don't reflect are vampires.

I would like to point out that I searched for images of Rodin's statue "The Thinker" which were okayed for reuse without attribution, so I am being extra special sure that I am not violating anyone's copyright.  One of the things I became aware of with "Photo Fun" is the need to make sure in advance that I am using images that are approved for re-use, that are in the public domain.  It may take me a while to go back and clean up all the materials I have created in my many years of teaching and to get rid of all my bootleg images, but I can make it a goal to clean up materials as I am navigating through them this current year.  And only to import images that are safe.

I do like to use images with my student's handouts and with my class website.  "Photo Fun" just made me aware that I need to proceed more cautiously, as I ransack the internet for pictures.  I think now that I am using an iCloud account, I might be including more images in my materials, because I can easily search for things from my phone and save them to my iCloud folder, no matter where I am or what I am doing.  As a teacher, I am always thinking about school, so this means I can be using my phone to hunt for stuff wherever I happen to be. 

The other tool I think I will be using more and more is the Bitmoji.  I am already bombarding friends' with Bitmojis in all the text messages I have been sending out since discovering this cool, new toy.  Will it get old?  Possibly.  But all my jokes are old to begin with, and I can see getting a lot of use out of this one.  There are almost endless possibilities of ways to use them to communicate with students whole-class and individually, and the production of new Bitmoji icons is on-going, according to the articles I read.  I can be the one to make the obscure reference to the newest movie or TV show.

Bitmoji Image

The third tool I studied in this course was digital portfolios.  I liked what I read, but I feel that a lot of the success in this area will be dependent on the effort I can get my students to produce.  I want to help them develop meaningful portfolios, so I will be poking and pushing them all I can, but the reflection piece is going to land in their court.  Maybe I should share with them some good examples of portfolio entries that model "reflection."  In any event, this is going to be the hard lift for me.  Images and Bitmojis are simply more fun.

The overall experience of taking this course has been a positive one.  I really do like on-line learning, and I like it that the course has assembled a variety of tools I may explore, and a lot of different articles and approaches to each tool.  Not everything is applicable to my personal situation, but I have the opportunity to play around with what DOES work for me.  And since I am teaching at the middle school level, some things from elementary classrooms still work -- and some things from high school classes can be meaningful as well.

And finally, a word from my cat.

Thing 14: Bitmoji Fun

I have been aware of bitmojis for a few years, because a friend of mine discovered this function and was constantly posting cute little cartoons about her daily travails on Facebook, but I never had considered creating my own bitmoji, nor had I ever thought of it as a possible tool to use in the classroom.

But since I am a big fan of my iPhone, I decided that I would try putting the app on my cellphone, and see if it would be something I could play around with there.  After I had downloaded it and entered the app, it had me take a picture of myself, and then presented several images that supposedly looked like me, and wanted me to choose one before going further.  To me, this was like one of those eye-exam tests, where they have you switch back and forth between two lenses, and ask you which was better, A or B?

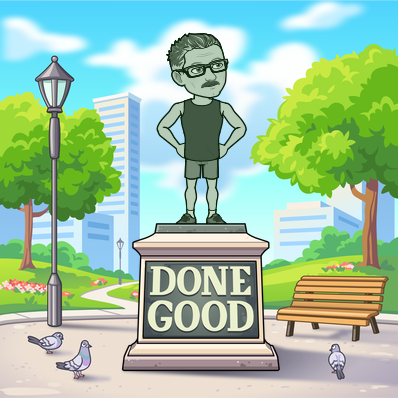
To me, none of the images really looked that much like me (whereas my friend, who'd used the app before, had an image that was COMPLETELY like her).  So I asked a friend for help, and he helped me through the whole process of setting up my Bitmoji.  I still don't think it looks that much like me (I only wish I looked that young), but maybe to other people.  I think Robert Burns said something like "Oh what a gift it were to gi'e us, To see ourselves as others see us."  I think for add ons I still need dark circles under the eyes, but this is me for now: 


I found it pretty amazing that one of the first choices that popped up for me had me standing looking out a door at snow -- and we just had 18 inches.  The front porch in the bitmoji even looks like my own front porch, so I worry a little that Bitmoji might be psychic.  If that's so, I better look for an image of me winning the lottery.

I then added the extension to my Chrome browser, and practiced inserting a bitmoji into an email.  It was easy.  All I did was click on the little bitmoji of my head next to the send bar, and I looked for and found the same image of my surveying my snow-covered porch.


I notice the icon is up in the corner of my Chrome browser now, so I will see if I can easily bring an image into the blog entry I am composing now.  Let me just test this . . .

Bitmoji ImageIt looks like that worked!

Now the challenge is going to be using these images when I am teaching.

The articles "Bitmoji in the Classroom," "Back to School with Bitmoji," and "Why and How I Bitmoji in the Classroom," all make strong cases for using Bitmoji to jazz up comments and communications and make them fun.  I especially like the idea of making my own stickers.  I am a big stamp and sticker guy (I even have a personalized rubber stamp that tells a student he or she is a star, since shooting for the stars is a theme in my classroom).  If I can print stickers that have me actually sharing that message (or use them digitally when students submit work on Google Classroom), how much neater will that be for my kids.

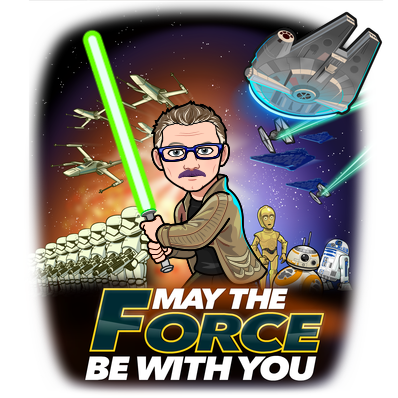
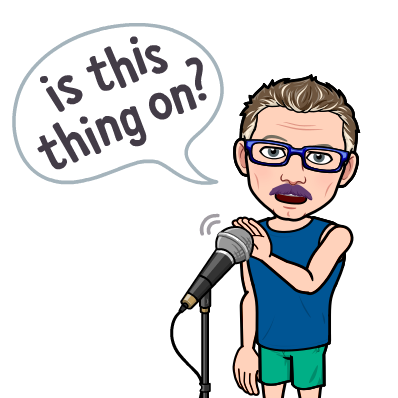
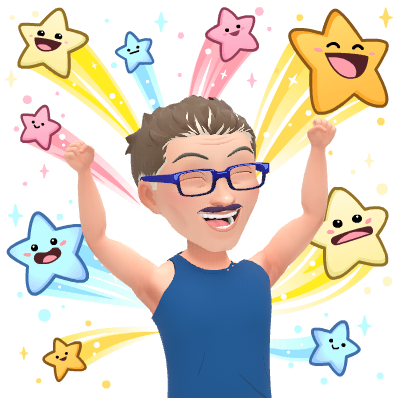
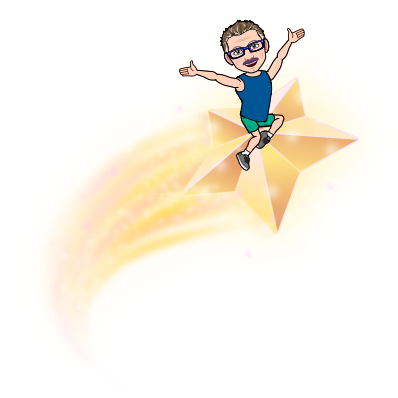
A couple of the articles shared templates I could use to print onto stickers, and that's a great resource, since I know how tedious it can be printing and re-sizing, as you're trying to use the school's only color printer (and everybody's glaring at you).  But I think rather than using some of the bitmojis that they are working with, I would rather choose my own.  Here are four that seem to match my personality.  I am NOT the unicorn farting a rainbow that one teacher shared, but I am corny in my own unique way.
Bitmoji ImageBitmoji Image


Bitmoji ImageBitmoji Image

And here's the real me, shoveling.  


Friday, January 18, 2019

Thing 16: Digital Portfolios for Students

This tool attracted me, because last year, for the first time, we had our eighth graders create digital portfolios of their work.  They made presentations at the end of the year, to parents, administrators, and a few selected peers, and we all congratulated ourselves on getting them through the process.  

But I was disappointed in the final result, because something was missing.  It seemed that the students were standing in front of an audience, projecting images of art they had created, essays they had written, math equations they had solved, but without showing anything of their understanding of the work.  It was simply: "I did this."  Not: "In this project, I came to understand . . . "  I didn't see any metacognition.

The article, "The Art of Reflection," by Beth Holland, addressed this concern.  She suggests the need to have the students build reflection into their work, but not just during the time that they are working on developing their digital portfolio.  She points out that by having students focus on just a few essential questions from the beginning of the year (such as "What are the characteristics of good problem solvers?") and having them address these as they work, they can begin to incorporate their reflection into their portfolios, and this is learning that they can include in their presentations.

Since my school has spent a long time developing our mission and vision, and the students seem aware of the basic tenets of both, I think driving students to express how they have demonstrated tenacity, purposeful thinking, and self-advocacy in the work they choose to include, can make their portfolios more meaningful as we work on them this year.  We will begin this sometime during the second semester, but I am glad that I read this article in advance, because I am hopeful that this year presentations can be made more meaningful.

Matt Miller and Kasey Bell discuss the use of digital portfolios in their podcast "ePortfolios and Google Sites," (note -- they don't begin talking about portfolios until the 8:00 minute mark) and they talk about how student portfolios can be what are called "Showcase Portfolios" or they can be reflective of ongoing work.  I think that last year, our students' portfolios were definitely "showcase portfolios," because our scholars were only presenting one work for each content area, and they were usually showing only what they felt was their best work.  How much more interesting would the portfolios be, if they instead showed student growth?  

Miller and Kasey talk about how some schools have students develop portfolios in middle school and then continue them through high school.  This would definitely give them the opportunity to show growth.  So what I am having them start now may be continued.  But why I can't I get them to include both the first and final draft of an essay?  They can explain some of the revisions that they made, and why, and this would be another way of having them address the problem that I had mentioned earlier, with the lack of reflection.

Since my students will be using Google Sites, and there are so many things that they can do as a result, I would like to have them create a video that they embed into one of their pages, that includes their reflection.  In "Portfolio-O-Yeah," one physics teacher had his students develop digital portfolios that highlighted their work in his class, but also presented more information about the scholars.  I noticed that in one example, a student had included a video in which he was explaining something.  


I think it would be awesome to have a student include a video explaining some project that he or she had worked on.  I feel like my students would actually be more engaged if they were developing a video, too, and -- unlike a live presentation -- they would be able to come back and revise this video until it met their own standards of excellence.  They could see themselves as others see them, critique themselves, and make it into something that met their own standards for excellence.  And to be honest, my students are much more video savvy than I am.  Just watching them pose for selfies has taught me that!  

In any event, I fully intend to make our digital portfolios into something that carries more resonance for our students than our fledgling effort last year, and I am eager to get started on them next month.

Wednesday, January 16, 2019

Thing 3: Photo Fun

Okay, so I feel like my head is in a cloud sometimes, but now it is in an iCloud.

I love my iPhone, and really marvel sometimes at the tricks it can allow me to do, but the whole concept of the iCloud is totally amazing to me.  I am able to take pictures from my phone, edit them right then and there, and then -- without bothering to email them to myself -- simply access them from my laptop be going to my iCloud account.

If I become a little more savvy with this, I can see how I can quickly take a picture in class and then incorporate it into the context of a lesson just like that.

I am including below some pictures of some of my students wearing hats my mother and her friends made.  My mother is 88 years old.  She and her friends (they live in Virginia Beach) decided that my students in Rochester must be perpetually cold, because we are so far north.  She asked me if they could make us some hats, and I told her sure.  Little did I know I would be receiving 200 hats.  Practically every student at my school has one now, and whenever I see one of the brightly colored hand-made hats, I get a pleasant feeling.  They provide warmth in more than one sense of the word.

I took these pictures on my iPhone, saved them to the iCloud account I created, and then downloaded them directly onto my laptop.

It took a while to download each picture, and I discovered that if I tried to do more than one at once, that I invariably lost connection with my server.  This might be more of a personal WiFi issue than anything else, but I think that from now on, I will proceed in little chunks.  And save often.

My other valuable takeaway from this Cool Tool lesson was the flowchart Infographic in Samantha Lile's article "Can I Use that Picture?  How to Legally Use Copyrighted Images [Infographic].  Since we are doing curriculum writing at my school, I have had to realize that all the minor thefts that I have committed in the past, as I've cut and pasted images into documents I have been creating for my classes, are about to be broadcast to the world.  Yikes.  That means I need to go back and re-do my materials and replace anything I have used with permission with materials that are permissible.  It's a little bit scary, but I think the flowchart Ms. Lile provided helps to clarify what I can and cannot use.  It's a daunting task, but I have to get it done before everything goes public.  Wish me luck.